


Need to replace the daughter board on a MeliCAT Module? This guide will walk you through just that.
Anatomy of a Module
First, a quick overview of the parts of a Meliora module to define some terms. Most modules have 3 basic parts, the controller board, the daughter board and a bracket. There are two RJ45 connectors on the controller board for Power and EtherCAT data through CAT5 cables.

Take the Control System Offline
Before taking down the communication loop to all the modules, go to the “System” tab and place the vacuum system in “Standby”.

Go to “Utilities” → “EtherCAT Status” and press “DEACTIVATE”. After a confirmation prompt, this will take communication link to all the modules offline.

Locate the module in question. Prior to disconnecting any cables and wires, photograph and/or label where they are connected. This will aid you in re-connecting later.
Unplug the CAT5 cable(s) from the controller board underneath. This will remove power from that module (and any others daisy-chained behind it). Remove all connections to the daughter board.
Now free from all electrical connections, remove the module from its mount on the system.
Remove the Old Daughter Board
Remove the 4 screws securing the daughter board to the standoffs beneath.

Remove the daughter board from the module by pulling up firmly while wiggling it gently. This will slowly ease the pins out of the black 50-pin connector. Sometimes this can be really stiff, but if you keep pulling and wiggling, the two boards will eventually disconnect.


Attach the New Daughter Board
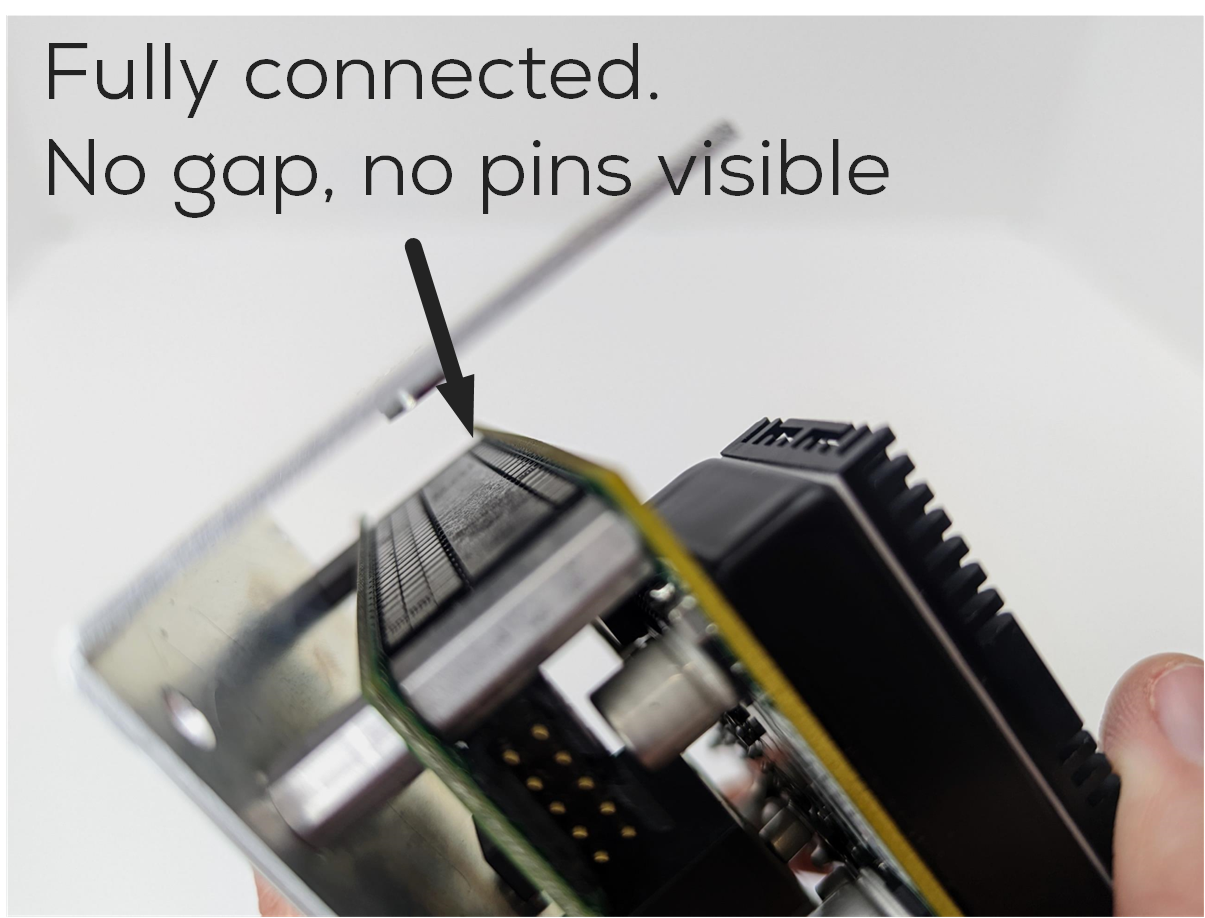
Ensure that the 50-pin connector is lined up correctly before pushing the pins in.

Place thumbs on top of the daughter board while wrapping other fingers around the bottom of the module bracket. Squeeze firmly until pins fully insert.

Re-install the 4 screws securing the daughter board.
Reconnect and Reactivate
Mount the module back in its place on the system. Re-connect cables and wires to the daughter board. Lastly, reconnect the CAT5 cables to the controller board underneath.

Wait about 20 seconds for all modules in the chain to power on again, then in the Utilities → EtherCAT Status screen, press the “ACTIVATE” button. This will bring communication back online. The new daughter board on the module will change the serial number of that module. Therefore, Lightsmith will inform you that the old module is gone and a new module has appeared. Follow Lightsmith’s steps to adopt the ‘new’ module into the system.